|
Modifying an Offenhauser throttle linkage kit to work with a 700R4 tranmission and a 292
When thinking about the install of the 292 ci inline six and 700r4 transmission into my 1963 Chevy II Nova, one of the things that I was most worried about was figuring out how the throttle linkage and throttle valve (tv) cable were going to work. There were a couple of factors that made the setup difficult:
- The extra height of the 292 changes the geometry of the entire pedal assembly, making it harder to achieve full throttle with the stock pedal assembly
- In order to achieve even fuel distribution, the carburetor is turned 90 degrees clockwise from it's usual orientation. This complicates the setup of the tv cable, as the 'out of the box' brackets they sell will not work
- The castiron stovebolt headers that I was using created additonal clearance problems with the stock throttle linkage
[WARNING/DISCLAIMER: This page documents my upgrade/conversion and does not replace the manufacturer's instructions in any way. If you choose to use this information, it is at your own risk. I take no responsibilty for the results. Modifying your automobile in any fashion can have dangerous and/or deadly consequences. You should always have a certified mechanic check your work.]

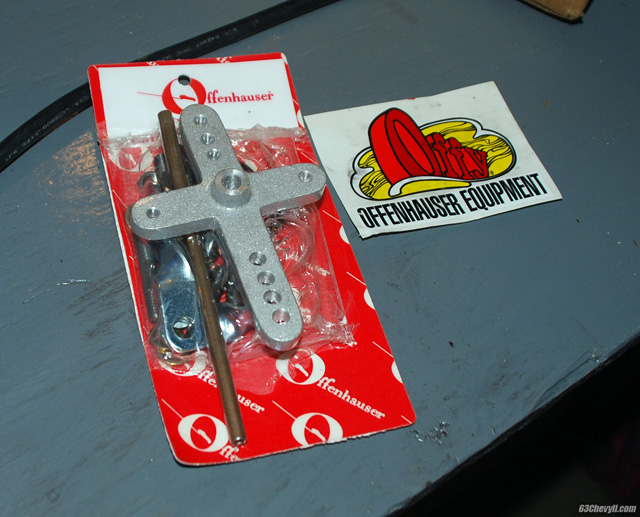
In the hopes of simplifying the setup, I purchased a linkage kit manufactured by Offenhauser [Linkage Kit: Chevrolet 1962-74 6 cyl Quad Manifold (5416K) (OFFY-5416-k)]. One of the things that I noticed immediately was that the kit did not have good instructions. It also seemed to have lots of extra parts that I did not need, further complicating assembly. After spending a few minutes posting pictures online and having a couple of guys look at the kit with me, we figured out how to put it together:
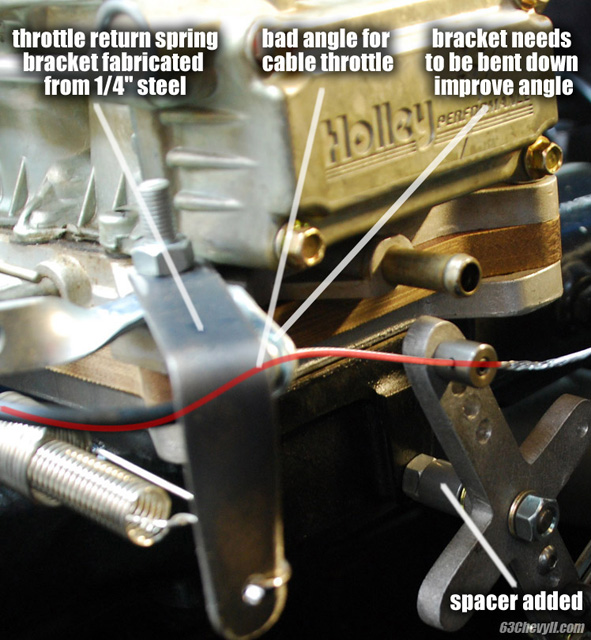
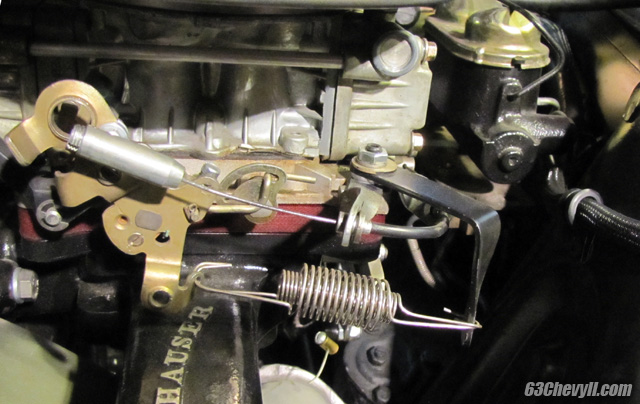
After assembling the kit and attaching it to the carburetor and intake, I realized that the bellcrank hit the base of the carb when rotated. I had to add a spacer to create enough clearance. After rotating the bellcrank to WOT, I also noticed that the throttle was not returning to the idle position. To fix this, I had to bend the bracket that holds the cable and sheath in place (to create a better angle and less drag) and fabricated a throttle return spring bracket (to increase the amount of pull created by the spring). Please note that a spacer was also needed (clearance issues) between the carburetor and intake. This spacer further exaggerated some of the geometry issues.
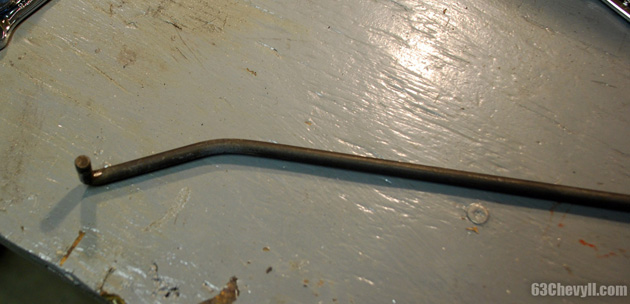
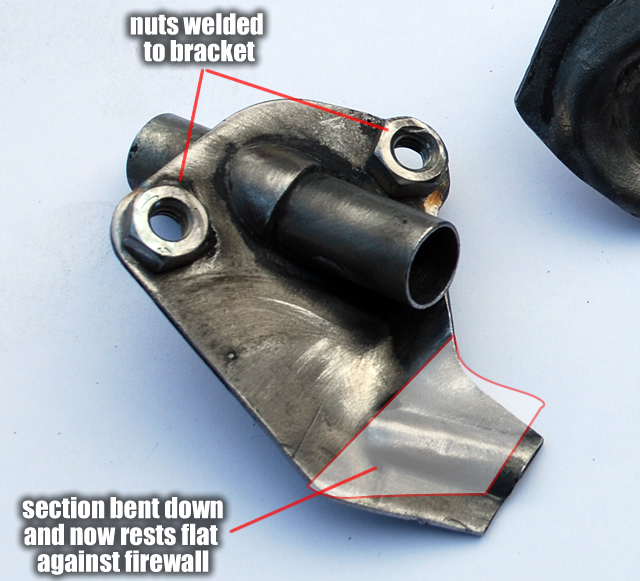
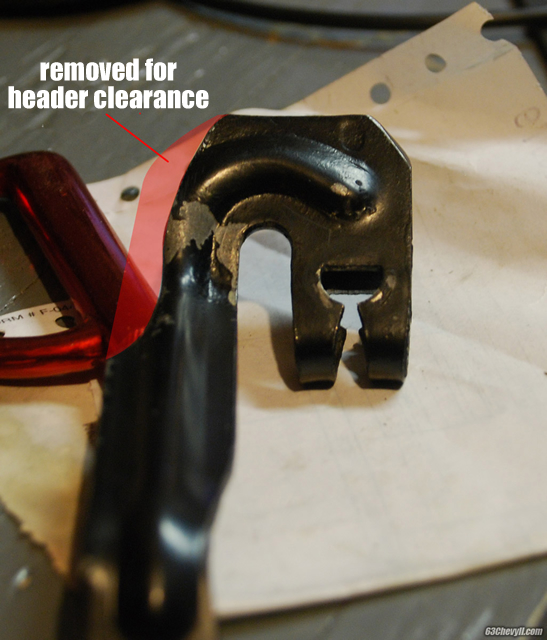
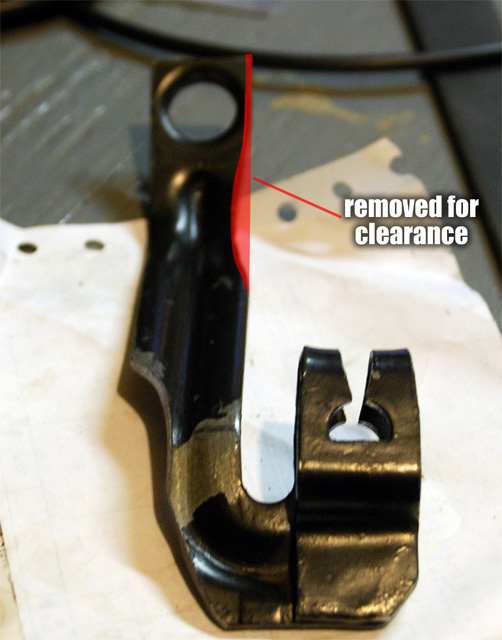
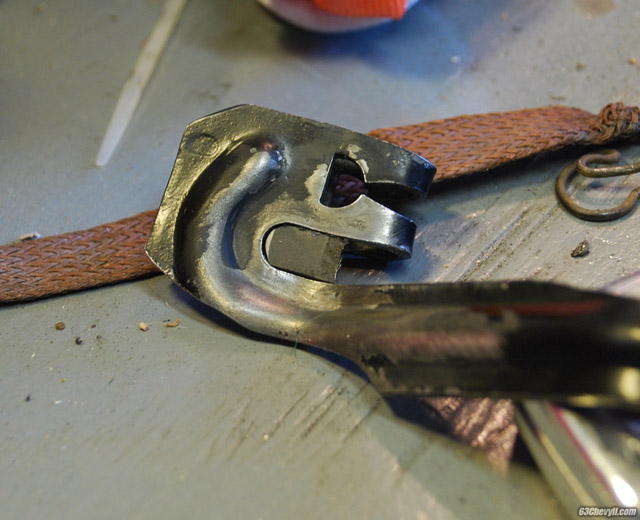
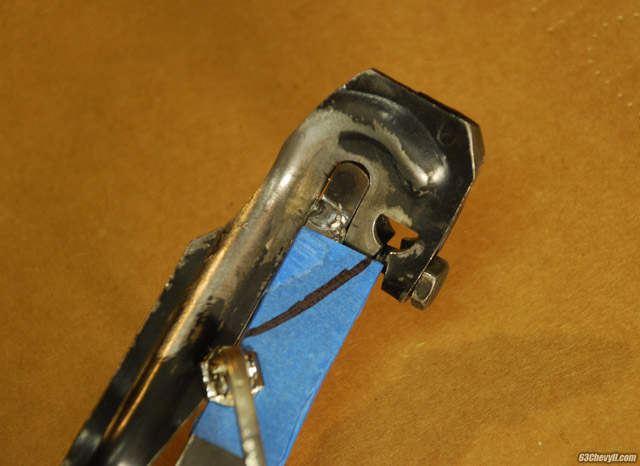
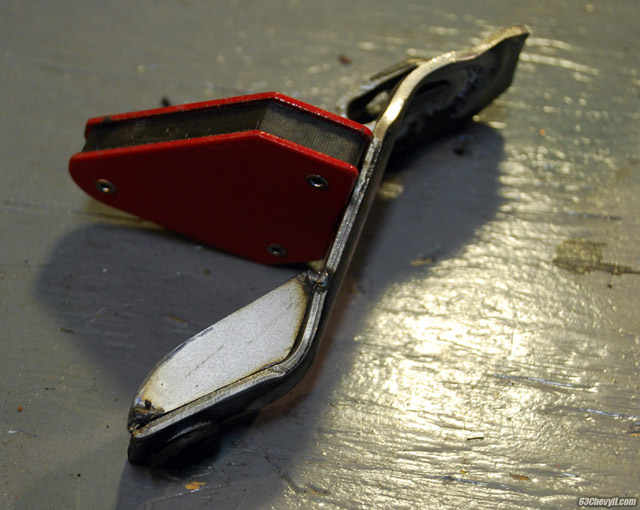
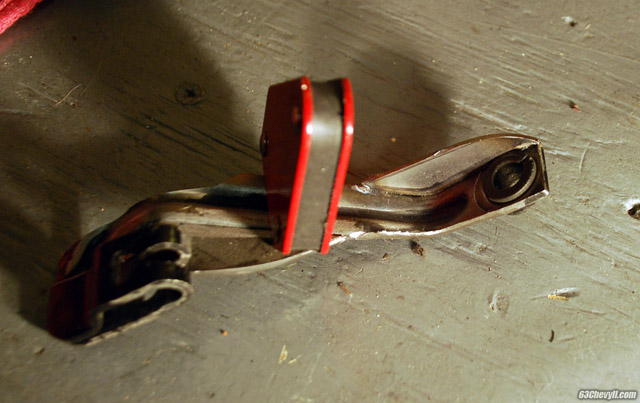
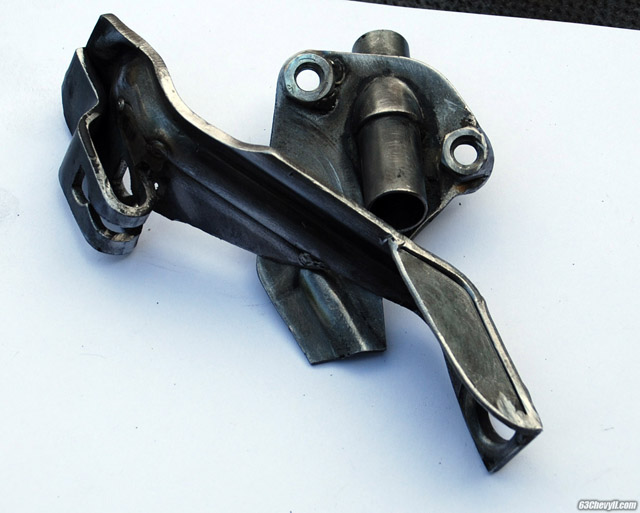
After hooking up the stock pedal assembly, I found a few problems. First of all, the rod wasn't clearing the cast iron headers. Once the rod was bent to clear the headers, I was not getting enought pedal movement to attain WOT. In order to get WOT, I had to modifiy the part of the pedal assembly that attaches to the firewall, as well as remove some material from the part of the assembly that moves when the pedal is pressed. While I was modifying these pieces, I also welded two nuts to the firewall piece to make installation and removal easier.
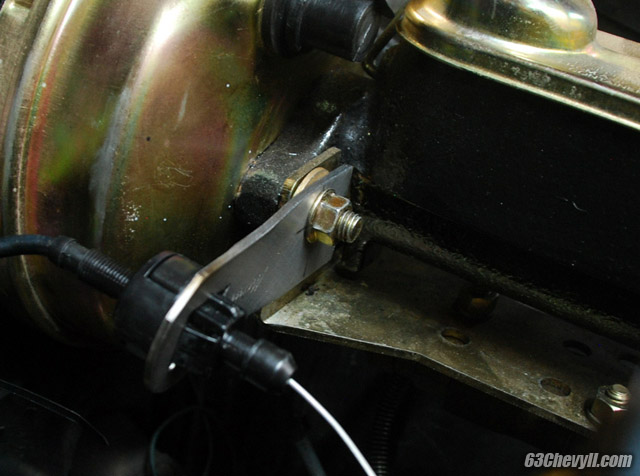
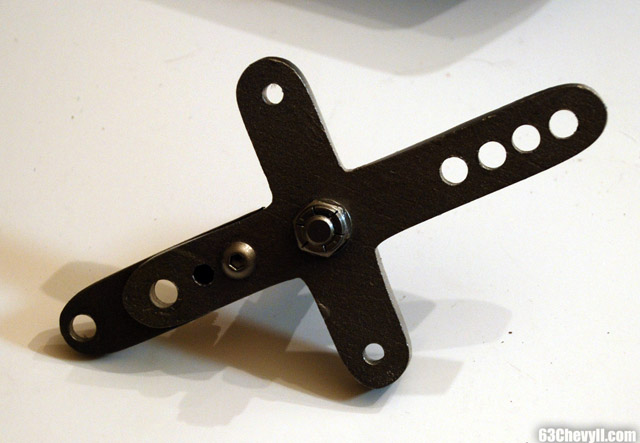
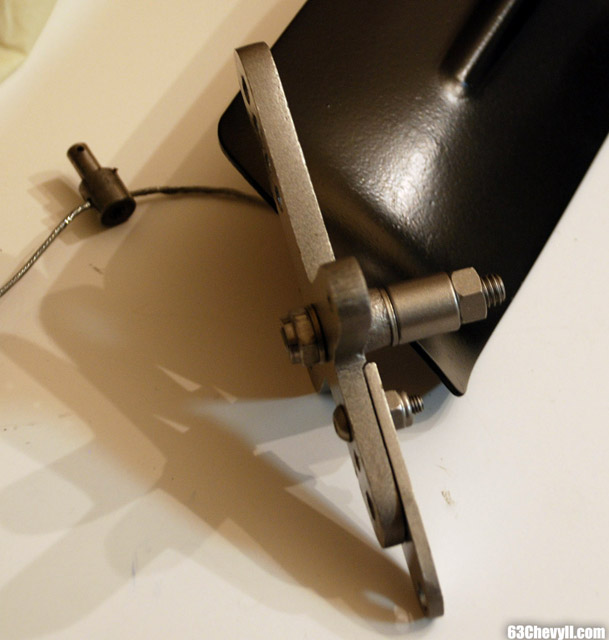
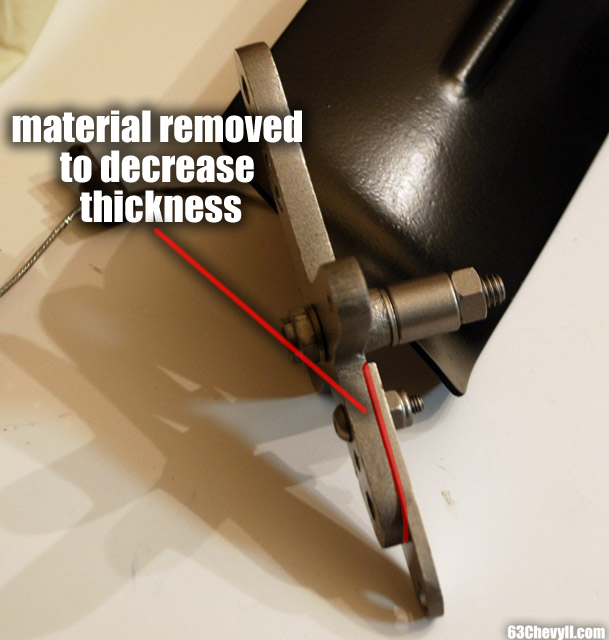
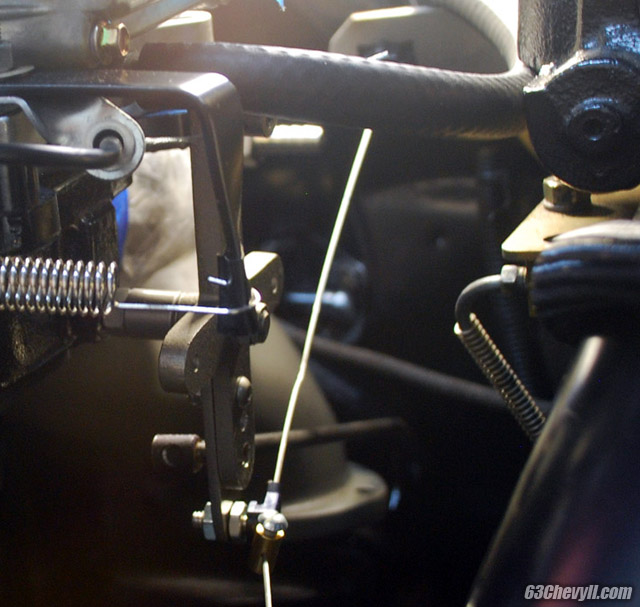
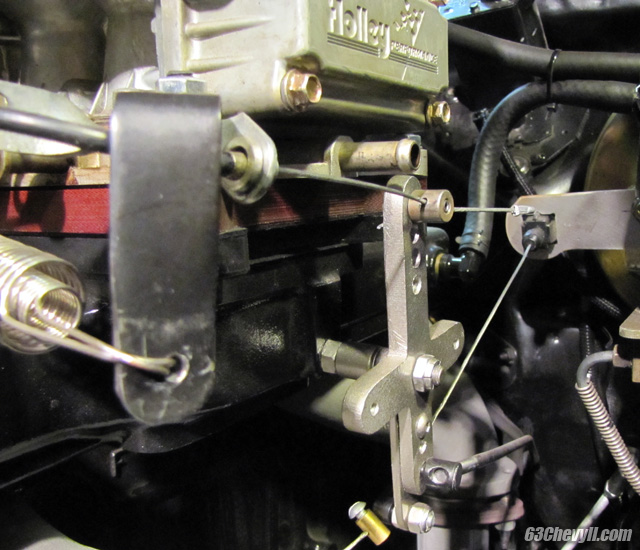
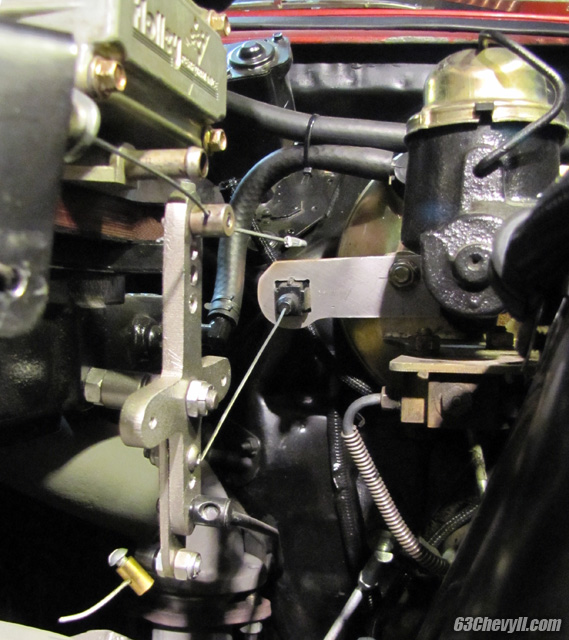
Now that I was finally getting WOT and everything seemed to be working together, I decided it was time to add the throttle valve (TV) cable for the 700r4 to the mix. I was given a part number for a TV cable bracket for my setup, but it did not work. Vince from Mayeda Motorsports looked at my setup and fabricated a bracket that would bolt to my brake booster. Once I installed that piece, we figured out that we could tie the TV cable into the throttle assembly by fabricating a piece to extend the length of the bellcrank. We figured out where the TV cable needed to be mounted on the extension by using TCI's instructions and some simple geometry. We used the instructions to figure out how much travel the cable needed (length of the arc), then applied it to my situation. We measured out how much the bellcrank traveled from the idle position to WOT (in degrees) and figured out how far the TV cable needed to be from the pivot point to attain the required amount of travel. Once I fabricated the extension and attached it to the bellcrank, I realized that when I bolted the bellcrank and the extension together, they were too thick for the throttle rod; I could no longer get a cotter pin through the hole in the end of the rod. I took the bellcrank to Mayeda Motorsports, where Vince reduced the thickness of it so that the end of the stock throttle rod would reach through both the bellcrank and the extension.
After
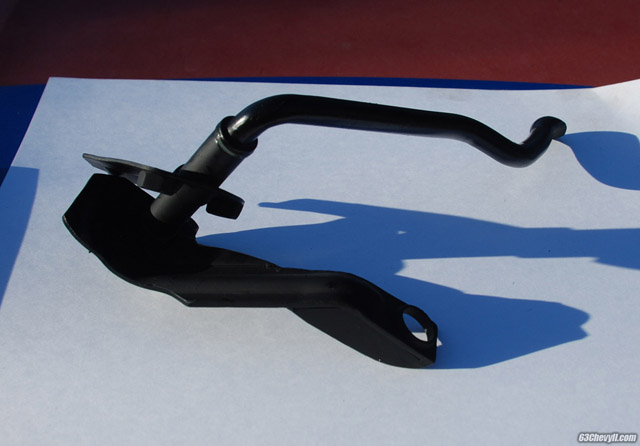
all of this work, I figured I was good to go. After hooking everything up, adjusting and re-adjusting, some weird things started happening over a few days. At different times I noticed that the bellcrank was not returning to idle position on it's own ( I tried to fix this by adding stronger springs and using a throttle return spring bracket that created more pull), I wasn't getting full throttle anymore, and I had header interference again. After spending a few hours trying to figure out what had happened, I realized that the pedal assembly was flexing, due to the me weakening it by removing material and the strong springs I was using for the throttle return. At this point I thought there was no way around using the strong springs, so I added some bracing to the pedal assembly.
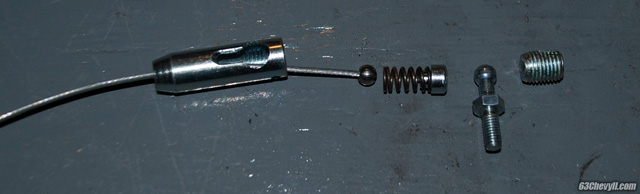
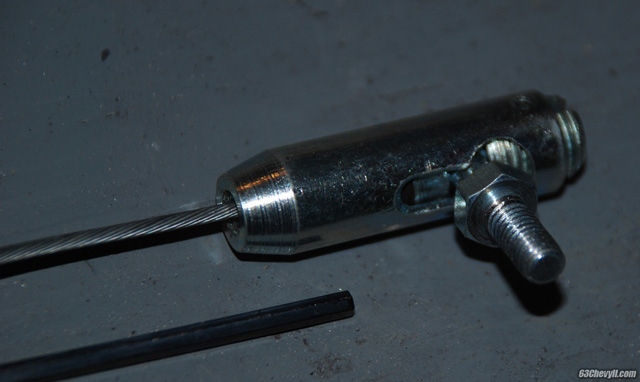
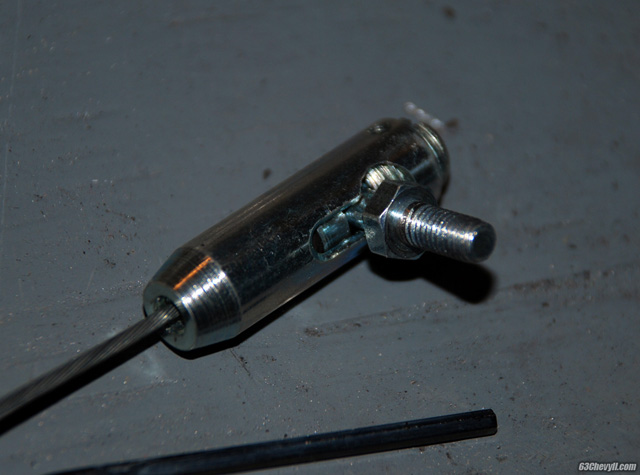
After making these modifications to the pedal assembly, I was working with the Offy throttle cable and sheath and realized that there was a lot of resistance/drag even when the sheath was straight and there was no load on the cable. I also realized that the sheath was longer than it needed to be and was probably causing some geometry problems. I went to a bike shop purchased a new sheath and cable. Using the new cable with the old, but now shorter sheath, greatly reduced the amout of drag. It reduced it so much that the longer throttle return spring bracket I made was no longer needed. I'm guessing that I also wouldn't have bent the pedal assembly if I had replaced and/or shortened the sheath to begin with. To date, I have about 500 miles on this setup and I am happy with it.
|